
Bulwark's Ambry is the Hidden Realm where you complete most Artifact unlock trials. Reach a Compound Generator on Sky Meadow or Helminth Hatchery, enter the pattern for the Artifact you want, and activate the laptop to create an Artifact Portal. Inside the realm, collect Artifact Keys and spend them at the central Artifact Reliquary until you can take the Artifact. Entering the portal alone does not unlock the reward.
The important condition is that the Artifact you selected becomes active during its own trial. Existing Artifacts remain active too, so a trial can change how monsters, damage, or item drops work before you have permanently unlocked its modifier. Choose a pattern whose rules you are prepared to survive. Completing the Ambry also continues the run through a portal to a first-stage environment; it is a detour from ordinary progression, rather than the final boss route.
Find the Compound Generator before leaving stage five
The most familiar entrance is underneath Sky Meadow. The generator sits on the stage's lower level, separate from the normal Teleporter. On Helminth Hatchery, the alternative stage-five environment associated with Seekers of the Storm, the generator is on the highest level. These opposite placements are an easy source of confusion: searching only underneath the Hatchery repeats a Sky Meadow habit in the wrong layout.
Treat the search as part of your stage route. Pick up useful items, identify the Teleporter, and find the generator before committing to a departure. If your goal for this run is an Artifact, the generator is the interaction that matters. Following the ordinary Teleporter route without entering the Artifact Portal takes you somewhere else.
The device has nine inputs arranged as a three-by-three grid. Each input cycles through square, circle, triangle, and diamond. Set the entire pattern, then interact with the laptop. Verify the positions from the same viewing direction before activating it: a correct collection of shapes in the wrong rows is a different pattern.
You do not need to discover every hidden stone tablet in the world before entering a known code. The tablets provide hints to patterns; the generator checks what you entered. If you are following a code reference, keep that reference oriented consistently and check each row in order. This page concentrates on reaching and clearing the realm, so use the specific pattern for your chosen Artifact rather than improvising one.
Recognize the Reliquary and opening key
The Artifact Reliquary floats in the middle of the arena. It is a large central mechanism, not a normal enemy that you defeat by emptying your magazines into it. The key interactions advance the encounter. The arena's platforms give you places to move, collect drops, and approach the Reliquary between waves.
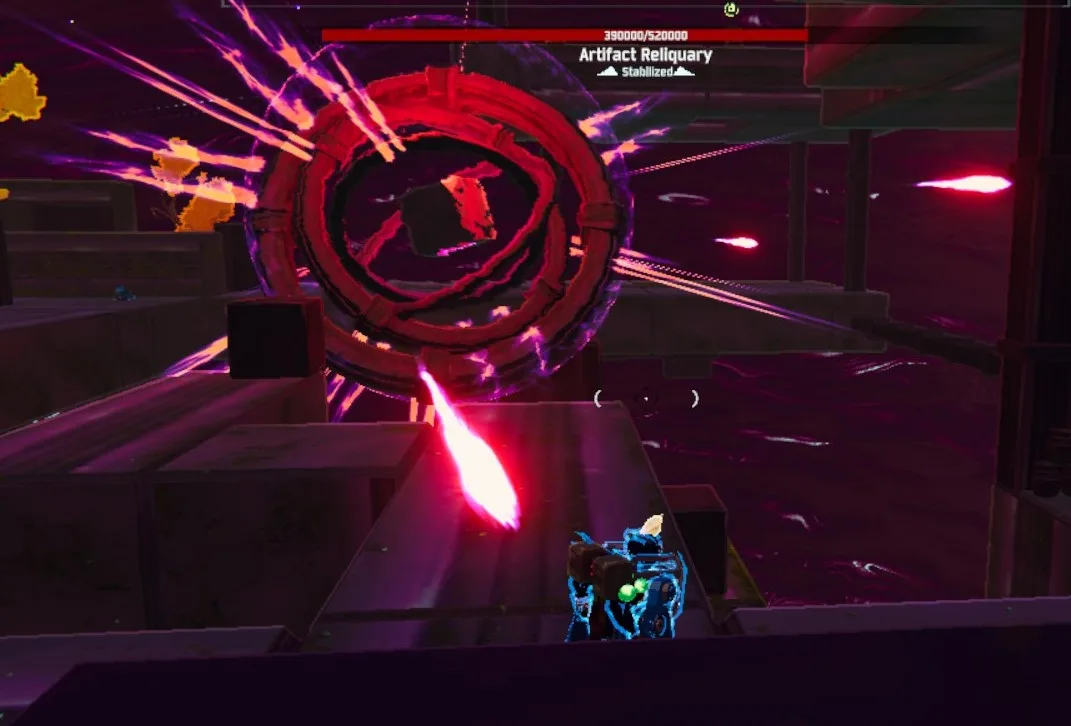
Use Artifact Keys at the Reliquary; ordinary damage does not replace the key interactions.
An opening Artifact Key appears on an elevated block in front of the Reliquary. Collect it and interact with the Reliquary to start the event. A quiet arena before that first interaction is expected. If you arrive, see no enemies, and assume the trial failed to load, first check whether you have actually picked up and used the opening key.
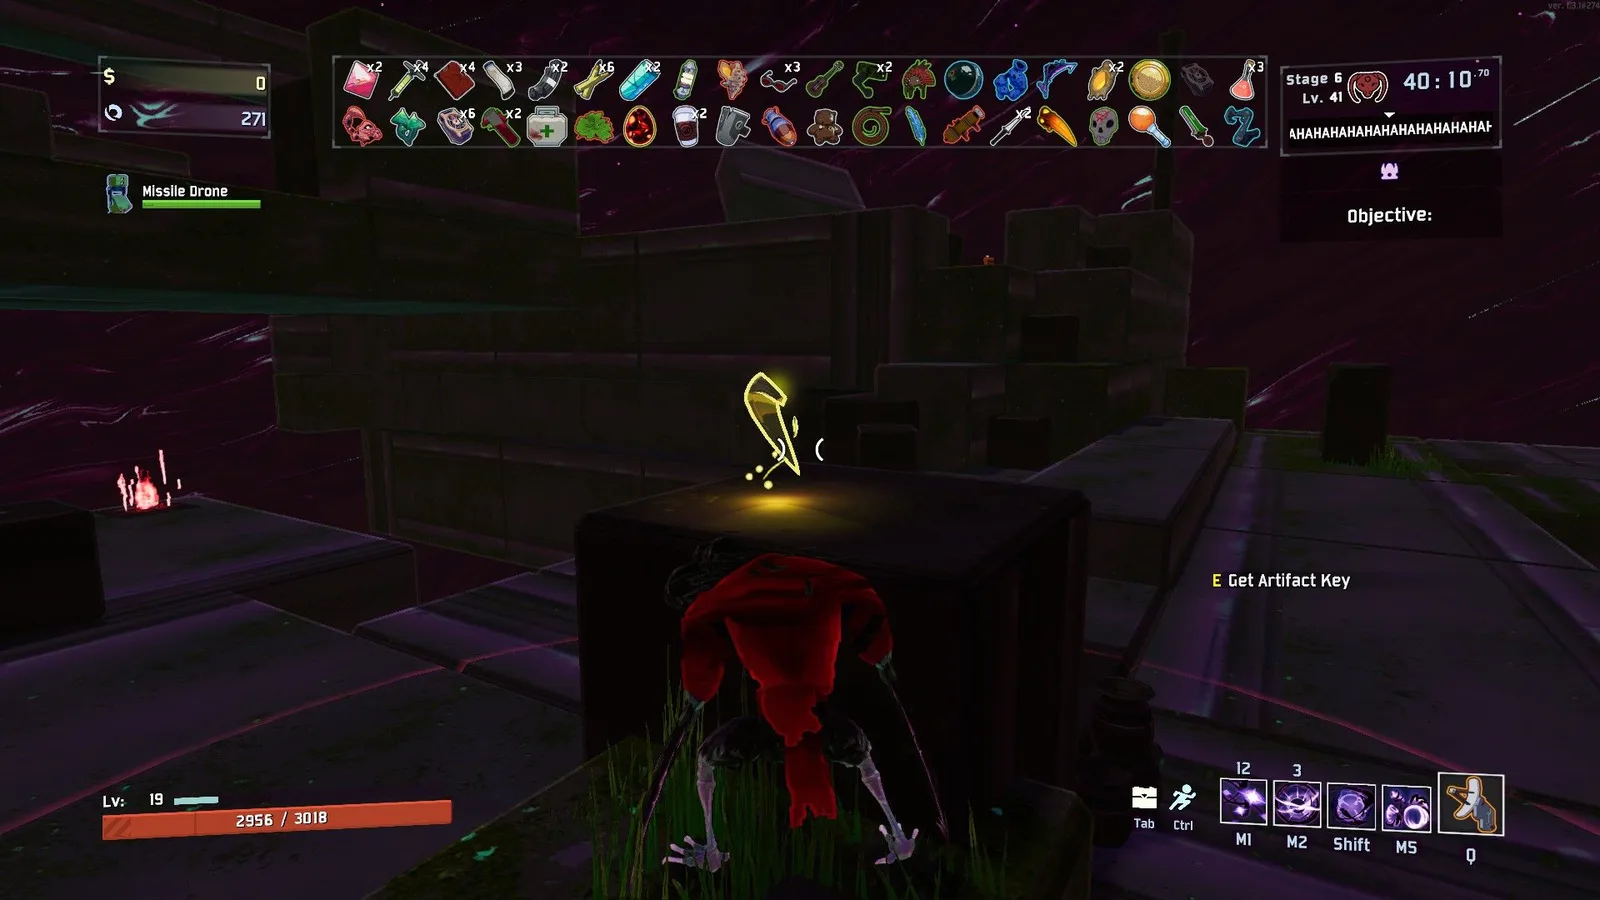
Collect the opening key before starting the Reliquary encounter.
The key is a temporary objective item for this encounter. Its purpose is to let you interact with the Reliquary, so treat it differently from the ordinary items powering your survivor. A damage build helps you survive the enemies that provide subsequent keys; it does not bypass the encounter's central objective.
Plan the route from the key platform back to the Reliquary before you begin. You will repeat the pickup-and-return pattern while enemies are present. Knowing where the central interaction can be reached reduces the chance that you spend a wave wandering through the arena with a key already in your inventory.
Clear the trial one key interaction at a time
Use this order for the normal trial:
- Collect the starting Artifact Key from its elevated platform.
- Approach the Artifact Reliquary and use the key to begin the encounter.
- Kill the enemies that spawn around the arena.
- Watch for another Artifact Key among the drops and collect it.
- Return to the Reliquary and spend that key.
- Repeat the combat and key interactions until the Reliquary is destroyed.
- Pick up the exposed Artifact, then use the exit portal to continue the run.
The normal sequence uses four keys in total, including the opening key. Think in terms of interactions completed rather than damage dealt to the Reliquary. If the boss display still looks intimidating, that does not mean your survivor needs a higher-damage weapon to finish it. Your immediate work is to keep surviving the wave, find the next key, and reach the interaction point.
Later keys drop from defeated monsters. They are not all waiting on the original elevated block. Move through the places where enemies died and inspect the drops. Continue killing enemies when no new key has appeared; do not stand beside the Reliquary waiting for it to hand you one automatically.
Using an Artifact Key removes keys from all players' inventories. In a cooperative lobby, two players collecting keys at similar times does not provide a reserve that can always be spent later. Announce the interaction and avoid planning around hoarding several keys across teammates. A shared objective is easier to track when someone explicitly watches the Reliquary while others keep the arena manageable.
The Reliquary can fire tracking projectiles during the fight. Keep moving while preparing an interaction instead of waiting motionless at its center. You still need to manage the monsters on the platforms; the objective is not a safe zone that prevents surrounding enemies from attacking.
Account for the Artifact rules during the encounter
The selected Artifact is already active while you attempt its trial. This is the most important difference between the Ambry and a standard Teleporter event. An unlock run for Glass, for example, takes place under Glass's damage and health changes. A trial for Honor changes the enemy roster to elites. The encounter teaches the modifier by making you fight under its conditions.
Artifacts enabled at the start of your run remain relevant inside the Ambry. Before combining several modifiers, consider what the combined rules will do to your ability to get keys safely. A combination that feels comfortable while clearing an open stage may become harder when you must revisit one central object and traverse separated platforms.
For a first unlock, a simpler setup makes failures easier to interpret. You can choose a lower difficulty if your goal is collecting the Artifact rather than proving a challenge clear on a particular setting. Arrive with a functioning build and enough mobility to navigate the arena. A route to the Reliquary matters as much as a theoretical damage total when the next key is on another platform.
Do not confuse taking the Artifact with toggling it for every future run automatically. Once unlocked, it becomes available in the run setup. You decide whether to enable it for a later run. In multiplayer, available Artifacts are pooled from the players in the lobby, which can also explain why you see a modifier that your own profile has not unlocked.
Identify which Ambry variant you entered
Bulwark's Ambry can use its original environment or one of three variants added with Seekers of the Storm: Aphelian Research, Tar Research, and Wisp Research. The central task stays the same, but the platforms and landmarks differ. A screenshot of the original layout is useful for recognizing the Reliquary without being an exact map of every possible version.
| Variant | What to check when you arrive | Environment Log location |
|---|---|---|
| Original Bulwark's Ambry | Block-shaped platforms around the central Reliquary | A small platform underneath the level |
| Aphelian Research | Elevated platforms and a large circular ring | One of the highest platforms beside a large circular ring |
| Tar Research | Broken ring pieces above the arena | The second-highest broken ring piece floating above the level |
| Wisp Research | Descending square platforms beneath the level | The lowest platform in that descending set |
Use the variant name and its landmarks to decide where to search. Searching below every arena because that worked in the original layout wastes the limited collection window in Aphelian Research. Likewise, searching only the upper ring structures will miss the Wisp Research log beneath the main fighting space.
Before the first key interaction, take a moment to see how the connected platforms lead toward the center. Once monsters start spawning, a route you already understand is safer than trying to learn every jump while following a dropped key. This is especially useful if your survivor has limited air control or you are carrying a large amount of movement speed.
Collect the Environment Log within its time window
The Environment Log disappears five minutes after you enter the realm. That timer starts on arrival, rather than after you start the Reliquary event. If you want the log, make a deliberate choice to search for it early. Completing the combat objective and then beginning a long exploration can leave you looking for a collectible that is already gone.
In the original variant, the introductory view can help you notice the little platform underneath the level. For the other variants, use the distinct ring or descending-platform landmarks in the table. Check your route back before dropping into a lower area. A collectible is not worth losing the entire unlock attempt to an uncontrolled fall.
The log and the Artifact are separate rewards with separate conditions. Missing the log's five-minute window does not mean you can no longer finish the Artifact trial. If it has disappeared, return to the Reliquary objective instead of treating the run as unusable. You can make a dedicated log attempt later with a survivor whose movement suits the search.
Diagnose a stalled attempt from the current objective
If the arena is empty, check the opening key and Reliquary interaction first. If enemies are spawning but the Reliquary is not progressing, check for a dropped key and bring it back. If the Reliquary has been destroyed, take the exposed Artifact before heading to the exit. These are different encounter states with different next actions.
A missing exit before the objective is complete is also expected. The exit portal appears after you finish the Reliquary trial. Searching the corners for an ordinary Teleporter does not replace the Artifact objective. When the portal appears, it leads back into the run's stage progression through a first-stage environment, so prepare for continued play rather than a victory screen.
For cooperative attempts, make sure the team agrees on whether you are collecting the Environment Log immediately or beginning the trial. Splitting those priorities without communication can start enemies while another player is navigating beneath the arena. Coordinate the first key, keep track of each subsequent interaction, and collect the actual Artifact reward before leaving. That sequence makes the difference between simply visiting Bulwark's Ambry and finishing the unlock you came for.