Risk of Rain 2 Artifacts are optional run modifiers. Unlock an Artifact, enable it in the lobby before a new run, and its rule changes how that run plays. Most are unlocked through a coded trial in Bulwark's Ambry. Rebirth is an exception: it uses the Experienced Rebirth challenge and the Shrine of Rebirth rather than a Compound Generator code.
Start with Command if you want control over item choices, or leave modifiers disabled when you want to judge a survivor under ordinary loot rules. Artifacts do not all make the game easier. Several introduce lethal falls, friendly fire, stronger Teleporter events, or enemies with your own items. The right choice depends on the task you are practicing and the disadvantages you are willing to accept.
Compare the Artifact effects before enabling them
The name of an Artifact often says less than its actual rule. Use the effect column to decide what changes, and the final column to identify the first habit you should adjust.
| Artifact | Main effect | Immediate adjustment |
|---|---|---|
| Chaos | Enables friendly fire for survivors and monsters | Keep explosive attacks away from yourself and teammates |
| Command | Lets you choose items from their rarity's selection | Decide priorities before opening a selection menu |
| Death | A player's death can kill the whole team | Coordinate risky actions instead of treating deaths as individual |
| Delusion | Reopens eligible chests for a memory test after the Teleporter | Remember which item you collected from each chest |
| Devotion | Replaces broken drones with Lemurian Eggs | Choose the items you offer to followers carefully |
| Dissonance | Changes the usual stage-specific monster roster | Identify enemies before relying on familiar stage expectations |
| Enigma | Changes equipment after activation | Check the current equipment and cooldown after every use |
| Evolution | Gives monsters additional items between stages | Expect enemy effects to accumulate as the run progresses |
| Frailty | Makes fall damage doubled and lethal | Plan landings rather than relying on a survivable fall |
| Glass | Gives allies 500% damage and only 10% health | Avoid trades and remember that one-shot protection is disabled |
| Honor | Makes enemies spawn as elites | Build around elite threats instead of ordinary enemy assumptions |
| Kin | Limits a stage to one monster type | Adapt to the selected type's range and movement |
| Metamorphosis | Changes the survivor you spawn as | Use items that can work across different kits |
| Prestige | Provides Mountain Shrines and preserves their effects | Decide whether each extra boss reward is worth lasting escalation |
| Rebirth | Starts a run with a gift from a previous life | Deposit a useful eligible item before the intended run |
| Sacrifice | Replaces ordinary chest hunting with monster item drops | Fight for drops rather than saving money for normal chests |
| Soul | Creates wisps from defeated monsters | Keep moving after a kill instead of assuming the threat ended |
| Spite | Makes defeated monsters release exploding bombs | Leave the death location before the bombs detonate |
| Swarms | Doubles monster spawns and halves their maximum health | Prepare for more simultaneous attacks and targets |
| Vengeance | Sends a doppelganger after you every ten minutes | Consider how dangerous your own items are on an enemy |
Modifiers stack when you enable several. Do not evaluate one row as if the other rules disappear. Glass can turn a manageable extra enemy into a lethal mistake, while Chaos can make an otherwise useful explosion dangerous to its owner. A combination should solve a specific purpose rather than simply collect every modifier that sounds exciting.
Unlock most Artifacts through their own trial
On Sky Meadow, find the Compound Generator below the main stage. On Helminth Hatchery, find it at the top of the stage. Enter the selected Artifact's three-by-three pattern and activate the laptop to open an Artifact Portal. The nine inputs cycle through square, circle, triangle, and diamond.
Inside Bulwark's Ambry, collect the opening Artifact Key and use it at the central Artifact Reliquary. Defeat enemies, collect later keys, and keep interacting with the Reliquary until the Artifact is exposed. Take the reward before leaving through the exit portal. Merely visiting the realm does not permanently add the Artifact to your profile.
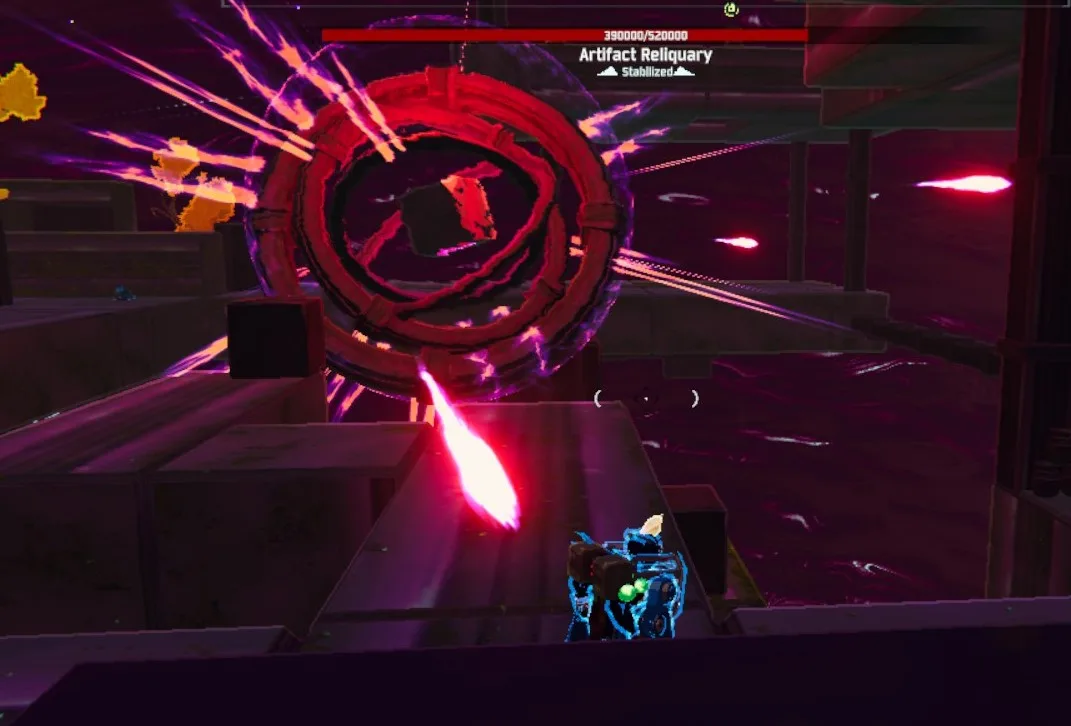
Use Artifact Keys at the Reliquary; ordinary damage does not replace the key interactions.
The trial activates the Artifact you are trying to unlock, alongside the modifiers you already enabled for the run. Read its effect before entering. This is especially relevant to Glass, Frailty, and Chaos: their rules can kill you before the unlock is complete. A lower difficulty can help you concentrate on the new modifier without changing what the modifier itself does.
Use Command without treating the menu as safety
Command replaces item drops with Command Essences. Each essence lets you choose an available item from the corresponding rarity. A common essence does not become a legendary item, and locked items do not become available simply because you enabled Command. Some items also remain tied to particular sources rather than appearing in every essence of a matching color.
The choice menu does not make you immune to damage. Clear immediate threats and know what you want before interacting. Spending a long time comparing options while monsters attack is a practical weakness of a run that otherwise provides unusually strong control over its build.
Command is useful for learning whether an item combination suits a survivor, or for setting up a skill challenge with specific support. It also changes the normal item economy: Multishop Terminals, most 3D Printers, Cleansing Pools, and Scrappers do not spawn normally with it. Do not plan a conventional printer route and then wonder why those interactables are missing.
In cooperative play, only one player can use a particular essence at a time. Agree on who takes each drop, especially when different survivors need different rarities or effects. Command gives the player who opens the menu a choice; it does not automatically distribute the ideal inventory across the team.
Change the loot route with Sacrifice or Delusion
Sacrifice makes monster kills the main source of item drops and removes ordinary chest spawns. Several other interactables, including printers, scrappers, drones, and qualifying Void Cradles, can still appear. Certain predetermined chests are exceptions too. The rule is a large change to the usual route, not a guarantee that every object containing an item vanishes.
Sacrifice drop chance is not affected by Luck, so Luck items do not increase it. Combining Sacrifice with Swarms does not justify assuming exactly twice as many item drops: the drop calculation is adjusted when Swarms is active. More enemies also mean more incoming attacks, even though their maximum health is reduced.
Delusion follows a different loop. After the Teleporter event, eligible opened chests close and offer a memory choice. Choose the item that came from the chest to receive another stack. Choose an incorrect item from your inventory and you can lose a stack of it. Track the actual collected item, including a rerolled result, rather than the first object you briefly saw on the ground.
The two loot modifiers do not create a straightforward multiplication trick. Delusion has nothing to do when Sacrifice is also enabled and the relevant chests are absent. Choose Delusion when you want chest-memory rewards, and Sacrifice when you want a combat-driven loot route.
Build a Devotion army around the offered items
Devotion replaces broken drones, turrets, and drone scrappers with Lemurian Eggs. Offering an eligible item hatches a follower. Your Lemurians share an item pool, so a newly offered item also affects the followers you already control. This makes the offering a decision about the army's combined behavior rather than a disposable payment for one creature.
The pools are separate for different players in multiplayer. A teammate offering an item does not add it to your own followers. Lunar, Void, and Meal items cannot be offered, and other blacklisted items are excluded. Plan with the choices the offering menu actually allows rather than assuming every powerful item in your inventory is eligible.
Followers evolve after qualifying boss events and gain more strength. They still need supervision around hazards. Losing a follower removes the item associated with its original offering from the remaining followers' inventories, so deaths can weaken the whole group. Do not judge the army solely by how many bodies are currently following you.
Treat Glass, Chaos, and Frailty as different risks
Glass is a damage-for-health trade with a particularly important consequence: one-shot protection is disabled. A high damage number does not make an unsafe position acceptable when a hit can end the run. Your defensive plan should focus on avoiding attacks and maintaining routes, rather than expecting the game's usual protection to rescue a trade.
Chaos enables friendly fire, including dangerous interactions with your own explosions. Effects such as Sticky Bomb, Will-o'-the-wisp, and Kjaro's Band can become risks at close range. Melee survivors should be especially careful about fighting directly inside the area where their own explosive effects resolve.
Frailty changes falls. Damage is doubled and can kill you, so ordinary shortcuts can become lethal. Loader's passive prevents her from suffering this fall-damage problem, and H3AD-5T v2 can negate the damage too. The rule should still affect how the rest of a team approaches a jump, even when one survivor can ignore it.
Manage enemies that inherit power from the run
Evolution gives monsters cumulative items as the run advances through stages that increase the stage counter. The cycle of rarity is common, common, uncommon, uncommon, legendary. Hidden Realms and other intermissions do not grant an extra item simply because you visited another area. As the enemy inventory builds up, effects you barely noticed early can combine into a much more dangerous fight.
Vengeance creates an Umbra that copies your items and equipment. A build that heals heavily or produces strong retaliation effects can be unpleasant to fight against. The trial of Vengeance has its own trigger: interacting with the Reliquary creates Umbrae for the players except on the final interaction. Do not expect the normal ten-minute invasion timing to explain every appearance inside that trial.
Prestige keeps Mountain Shrine effects between stages. Activating another shrine can mean more boss rewards, but its cost survives into later Teleporter events. Assess the next fights as well as the current one. In the Prestige trial, key interactions produce boss encounters, so its reward requires more than the usual expectation of collecting keys from ordinary waves.
Keep Rebirth's gift separate from code unlocks
Rebirth is unlocked through Experienced Rebirth. At the Shrine of Rebirth at the end of Prime Meridian, the second interaction lets you choose an item to gift and ends the run. Enabling Rebirth afterward gives you one stack of that stored item at the beginning of the next run where you use it.
The gift is single-use. A later deposit replaces the previously stored gift, and an empty shrine gift produces a random common item instead. Void items, Lunar items, and equipment are not eligible deposits. Pick an allowed item that meaningfully supports your intended opening, then check that Rebirth is enabled for the run where you want to spend it.